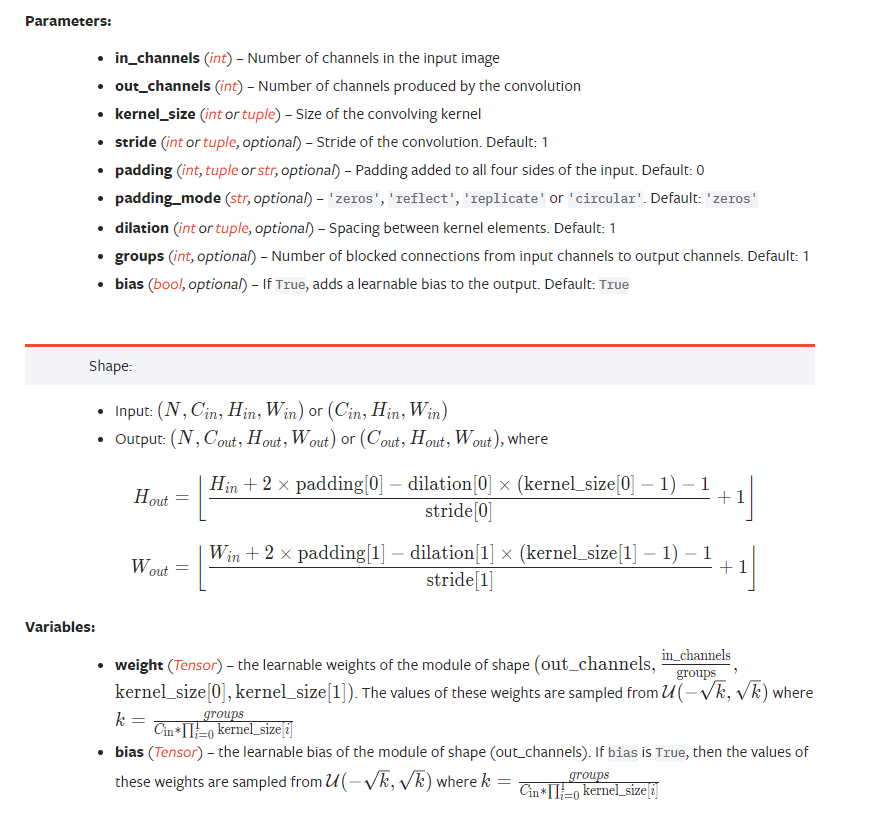
nn.Conv2d
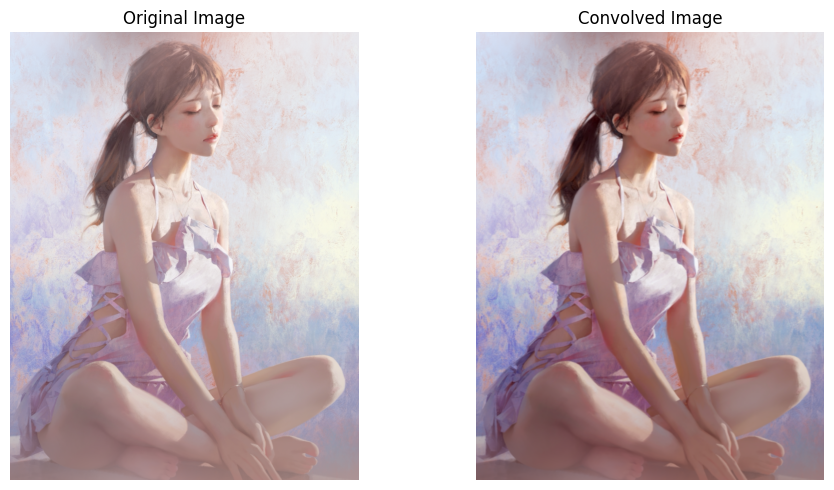
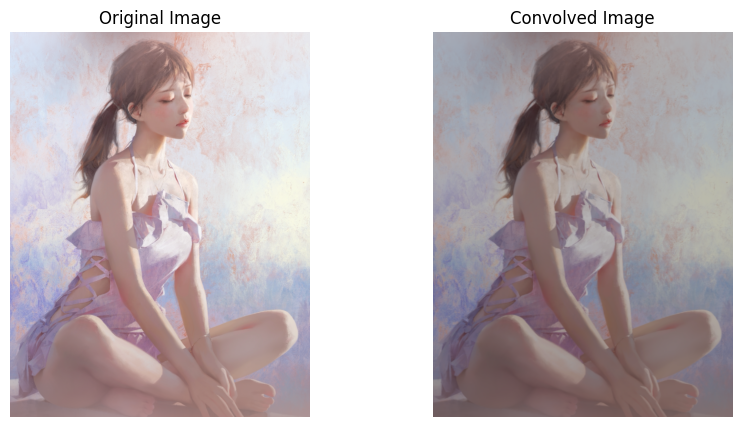
不知道为啥,调库的卷积和手搓的卷积效果不一样。。。
艹,发现了更离谱的现象,用tensor和numpy搓出来的卷积效果也不同。。。
代码和效果放在文章最后给出,希望路过的大佬能指出问题
卷积层的卷积操作和我想象的不同,故记录在笔记本

- 记住padding是在卷积前padding
- 每个卷积出来的像素值由所有kernel与通道算出来的结果相加得到
import torch
import torch.nn as nn

# 自定义卷积核权重,每个输入通道对应一个卷积核
custom_kernels = [
    torch.tensor([[1, 0, -1],
                  [2, 0, -2],
                  [1, 0, -1]], dtype=torch.float32),

    torch.tensor([[0, 1, 0],
                  [1, -4, 1],
                  [0, 1, 0]], dtype=torch.float32),

    torch.tensor([[-1, -1, -1],
                  [-1, 8, -1],
                  [-1, -1, -1]], dtype=torch.float32)
]

# 添加维度以匹配卷积核的形状 (out_channels, in_channels, height, width)
custom_kernels = [kernel.unsqueeze(0) for kernel in custom_kernels]

# 定义自定义卷积层类
class CustomConv2d(nn.Module):
    def __init__(self):
        super(CustomConv2d, self).__init__()
        self.conv = nn.Conv2d(in_channels=3, out_channels=16, kernel_size=3, padding=0, bias=False)

        custom_weights = torch.stack([torch.cat(custom_kernels, dim=0), torch.cat(custom_kernels, dim=0), torch.cat(custom_kernels, dim=0)])
        print(custom_weights.shape)
        self.conv.weight = nn.Parameter(custom_weights, requires_grad=False)

    def forward(self, x):
        return self.conv(x)

# 创建自定义卷积层实例
custom_conv_layer = CustomConv2d()

# 输入数据
input_data = torch.ones(1, 3, 5, 5)  # (batch_size, channels, height, width)

# 运行卷积操作
output = custom_conv_layer(input_data)

print("输入数据:\n", input_data[0][0])
print("输出数据:\n", output[0][2])
以该段代码为例,我们可以发现卷积核的shape为 [in_channels, out_channels, kernel_size[0], kernel_size[1]],也即 [3, 3, 3, 3] ,也就是说out_channels会有3个,分别是怎么得到的呢?
out_channels[i] 由卷积核 in_channels[0][i] 、in_channels[1][i]、in_channels[2][i] 进行卷积操作然后三个操作得到的值相加得到的。
可以修改卷积核的值自行尝试,会发现3个通道的值得到的像素一样,并且为3个通道的卷积之和相加的结果
-
tensor扔进nn里的数据结构为
[batch_size, channels, height, width] -
因为我自己试过一些卷积,我觉得对图片实施卷积完全可以RGB每个通道一个卷积核,然后每个通道的值直接获得,于是利用nn.functional 的Conv2d来实现:
import torch
import torch.nn.functional as F
from torchvision import transforms
from PIL import Image

# 读取图片并转换为张量
image_path = '../../img/3.png'
image = Image.open(image_path).convert('RGB')
image_tensor = transforms.ToTensor()(image).unsqueeze(0)

# 定义卷积核(滤波器)
kernel = torch.tensor([
  [[1/9]*3]*3,

  [[1/9]*3]*3,

  [[1/9]*3]*3
], dtype=torch.float32)

# 执行卷积操作
num_kernels = kernel.shape[0]
num_channels = image_tensor.shape[1]
output_tensor = torch.zeros((1, num_kernels, image_tensor.shape[2], image_tensor.shape[3]))

print("image_tensor.shape: ", image_tensor.shape)
print("kernel.shape: ", kernel.shape)
print("output_tensor.shape: ", output_tensor.shape)

for i in range(num_kernels):
  conv_result = F.conv2d(image_tensor[0, i].unsqueeze(0), weight=kernel[i].unsqueeze(1).unsqueeze(2), padding=(0,1))
  output_tensor[0, i] = conv_result[0]

# 显示输出图像
# output_image = output_tensor[0].clamp(0, 1)  # 将像素值限制在0和1之间
# output_image = transforms.ToPILImage()(output_image)
show_tensor_img(output_tensor[0])
测试
调包实现卷积
优点:快,方便
缺点:学习过程慢,自定义参数麻烦
代码:
import torch
import torch.nn.functional as F
from torchvision import transforms
from PIL import Image

# 读取图片并转换为张量
image_path = '../../img/3.png'
image = Image.open(image_path).convert('RGB')
image_tensor = transforms.ToTensor()(image).unsqueeze(0)

# 定义卷积核(滤波器)
kernel = torch.tensor([
    [[1/16]*4]*3,

    [[1/16]*4]*3,

    [[1/16]*4]*3
], dtype=torch.float32)

# 执行卷积操作
num_kernels = kernel.shape[0]
num_channels = image_tensor.shape[1]
output_tensor = torch.zeros((1, num_kernels, image_tensor.shape[2], image_tensor.shape[3]-1))

print("image_tensor.shape: ", image_tensor.shape)
print("kernel.shape: ", kernel.shape)
print("output_tensor.shape: ", output_tensor.shape)

for i in range(num_kernels):
    conv_result = F.conv2d(image_tensor[0, i].unsqueeze(0), weight=kernel[i].unsqueeze(1).unsqueeze(2), padding=(0,1))
    output_tensor[0, i] = conv_result[0]

# 显示输出图像
# output_image = output_tensor[0].clamp(0, 1)  # 将像素值限制在0和1之间
# output_image = transforms.ToPILImage()(output_image)

# 显示原始图像和卷积后的图像
plt.figure(figsize=(10, 5))

plt.subplot(1, 2, 1)
plt.imshow(image)
plt.title('Original Image')
plt.axis('off')
plt.subplot(1, 2, 2)
plt.title('Convolved Image')
show_tensor_img(output_tensor[0])
运行时间:0.5s
效果:

numpy手搓卷积
代码:
import cv2
import numpy as np
import matplotlib.pyplot as plt
# 卷积

def custom_convolution(image, kernel):
    height, width, channels = image.shape
    k_height, k_width = kernel.shape
    convolved_image = np.zeros((height - k_height + 1, width - k_width + 1, channels), dtype=np.float32)

    for c in range(channels):
        for i in range(height - k_height + 1):
            for j in range(width - k_width + 1):
                patch = image[i:i+k_height, j:j+k_width, c]
                convolved_pixel = np.sum(patch * kernel)
                convolved_image[i, j, c] = convolved_pixel

    return convolved_image

# 加载图像
image_path = '../img/3.png'  # 替换为你的图像文件路径
image = cv2.imread(image_path)
image = cv2.cvtColor(image, cv2.COLOR_BGR2RGB)

# 定义卷积核
kernel = np.array([[1/16]*4,
                   [1/16]*4,
                   [1/16]*4])

# 进行卷积操作
convolved_image = custom_convolution(image, kernel)

# 进行卷积后的图像显示处理
convolved_image_display = (convolved_image - np.min(convolved_image)) / (np.max(convolved_image) - np.min(convolved_image)) * 255

# 显示原始图像和卷积后的图像
plt.figure(figsize=(10, 5))

plt.subplot(1, 2, 1)
plt.imshow(image)
plt.title('Original Image')
plt.axis('off')

plt.subplot(1, 2, 2)
plt.imshow(convolved_image_display.astype(np.uint8))
plt.title('Convolved Image')
plt.axis('off')

plt.tight_layout()
plt.show()
运行时间 23.8s
效果:

torch.tensor手搓卷积
# 手搓卷积
device = torch.device('cuda' if torch.cuda.is_available() else 'cpu')

def custom_convolution(image, kernel, device=device):
    image = image.to(device)
    kernel = kernel.to(device)
    channels, height, width = image.shape
    k_height, k_width = kernel.shape
    convolved_image = torch.zeros((channels, height - k_height + 1, width - k_width + 1), dtype=torch.float32).to(device)
    print(image.shape, convolved_image.shape)

    for c in range(channels):
        for i in range(height - k_height + 1):
            for j in range(width - k_width + 1):
                patch = image[c, i:i+k_height, j:j+k_width].to(device)
                convolved_pixel = torch.sum(patch * kernel).to(device)
                convolved_image[c, i, j] = convolved_pixel

    return convolved_image

img_tensor_conv_cus = custom_convolution(image_tensor[0], torch.tensor([[1/16]*4,
                   [1/16]*4,
                   [1/16]*4]))

# 显示原始图像和卷积后的图像
plt.figure(figsize=(10, 5))
plt.subplot(1, 2, 1)
plt.imshow(image)
plt.title('Original Image')
plt.axis('off')
plt.subplot(1, 2, 2)
plt.title('Convolved Image')
show_tensor_img(img_tensor_conv_cus)
运行时间:2min
效果:


叨叨几句... NOTHING